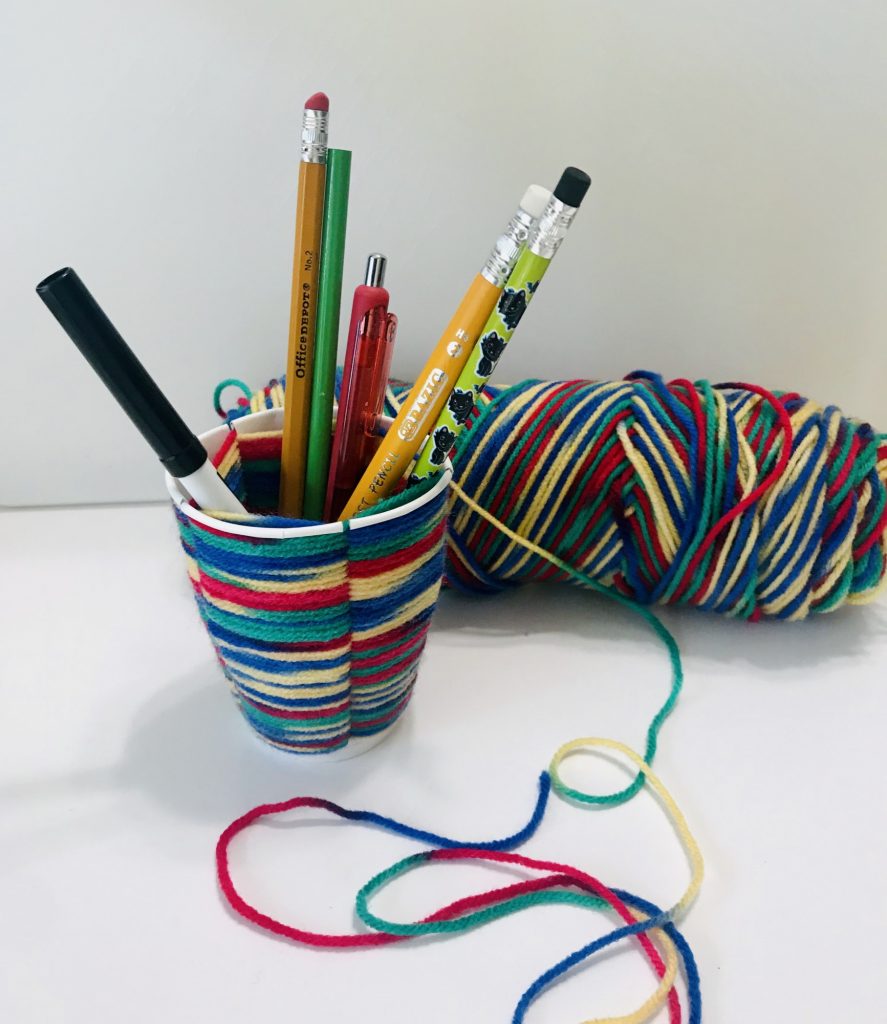
do it yourself: woven pencil cup
Dress up your child’s learning space with a handmade, unique and functional art piece! Use yarn and other fiber scraps to weave up a colorful cup for holding school supplies or other odds and ends. It’s so much fun to make, you may have a hard time creating just one! This DIY project is inspired by the Museum’s colorfully crocheted art installation, Whammock!
Woven Pencil Cup Tutorial
AGE: 4+ (with adult support)
TIME FRAME: 45 minutes
SUPPLIES:
- 1 Disposable Paper Cup
- Yarn (1 skein or multiple pieces of different colors)
- 1 Pair of Scissors
- 1 Marker
directions
1. Measure and cut your warp. Begin by measuring and cutting your warp, the part of the cup through which you’ll be weaving your yarn. It’s best to work with an odd number of strips in your warp, so first use a marker to make 5, 7 or 9 evenly spaced dots along the top of your paper cup. Then, cut the paper cup into strips starting at those dots, moving down to the base of the cup.
2. Start weaving. Begin by tying the end of the yarn onto one strip of the warp. Once tied, turn the knot inside the cup, so that it is out of view. Now, you’re ready to begin weaving. You’ll be moving the yarn over and under the strips on the cup. The strip on which you tied the yarn is going over itself, so the second step is to take the yarn under the next strip. Keep it going (over and under) from strip to strip. After every row, use your fingers to push the yarn together.
3. Changing yarns/colors. If working from one skein of yarn, you can continue weaving until you have woven all the way up the cup. If, however, you are working with more than one yarn or would like to change yarns throughout your weaving, you can do so by tying the old yarn and new yarn together with a knot and then tucking the knot behind the next strip.
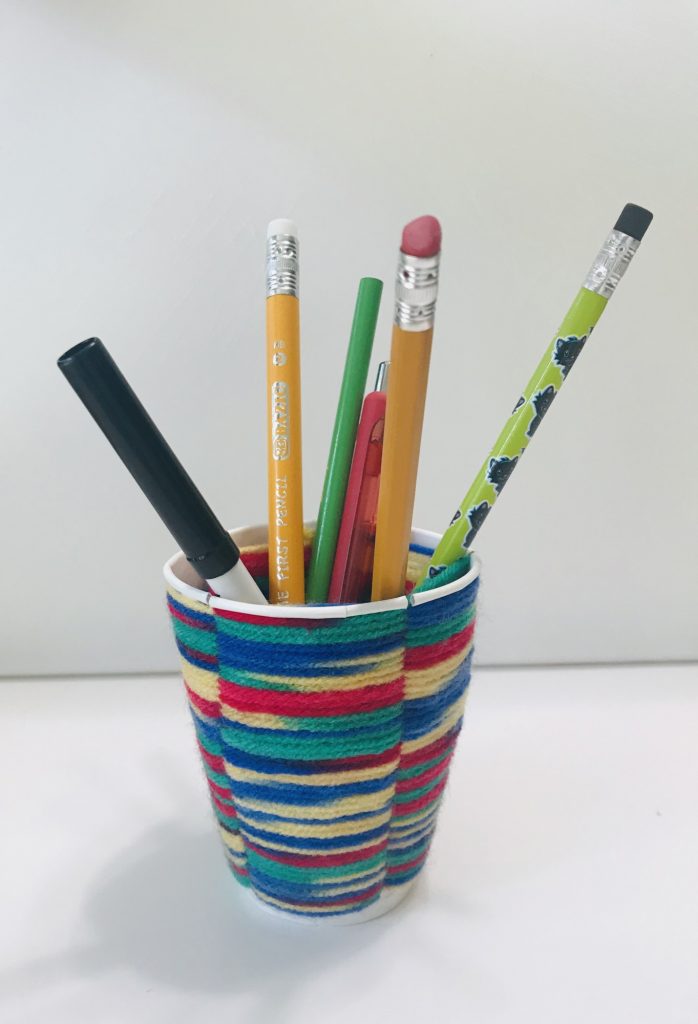
4. Finishing your weaving. It will take time to complete your weaving, but be patient and try to enjoy the process – weaving can be very relaxing. Once you’ve woven all the way to the top of the cup, you’re ready to tie off your weaving. Pull the end of the yarn inside your cup and tie a knot with it onto the top row of yarn. Trim the end to finish!
5. Share it and use it! You’ve finished weaving your pencil cup, and now you can put it to use. Find a spot for it in your learning space or give it as a gift to someone you know.
Additional Learning Activities (Grades K – 4)
Many Materials
Practice your new weaving skills using other materials. Explore making a weaving that includes different sizes, textures and types of fiber materials such as yarn, raffia, string and whatever you can find!
Test Your Shape
Experiment with shifting the shape of your work by weaving only part of the cup. Try cutting halfway down the cup and weaving just that portion. Decorate the unwoven part of the cup in other ways. You can also cut the full strips but only weave halfway up the cup and then find a creative way to shape or design the remaining part of the cup.
Select a Story!
Reading is a wonderful vehicle for learning and for introducing new ideas to learners. Select engaging and age-appropriate books that feature fiber arts or experimenting with art-making and read them to your child before and/or after the Woven Pencil Cup activity.
Recommended Related Reading (Ages 4 – 10):
- Rainbow Weaver/Tejedora del Arcoiris by Linda Elovitz Marshall and illustrated by Elisa Charvarri
- Abuela’s Weave by Omar S. Castaneda and illustrated by Enrique O. Sanchez
- The Weaver’s Surprise by Tom Knisely and illustrated by Megan Lloyd-Thompson
- Yazzy’s Amazing Yarn by Cathey Nickell and illustrated by Emily Calimlim
CA Arts Standards for Visual Art (Grades K – 4)
- Through experimentation, build skills in various media and approaches to art-making.
- Explore uses of materials and tools to create works of art or design.
- Discuss and reflect with peers about choices made in creating artwork.
- Create personally satisfying artwork using a variety of artistic processes and materials.
- Explore and invent art-making techniques and approaches.


