do it yourself: kaleidoscopes
We’re ringing in the new year with a colorful and festive project! Our campers have been making kaleidoscopes during the crafting portion of a day camp at the Museum. If you haven’t gotten a chance to experience our camp crafts yet, you can try making these projects at home! This month, we’re showing how to make DIY kaleidoscopes with some household items.
guidelines + materials
AGE: 6+
TIME FRAME: 30 minutes
SUPPLIES:
- Toilet paper roll
- Colored paper
- A thin sheet of plastic (can be from old packaging)
- A sheet of tin foil
- Colorful reflective items (thin reflective confetti, sea glass, etc.)
- Tape
- Scissors
- Hot glue gun
directions
1. Use the end of the toilet paper roll to trace a circle onto the colored paper. Cut out the circle. This will be your viewfinder! Cut a hole out of the middle so you can look though it.
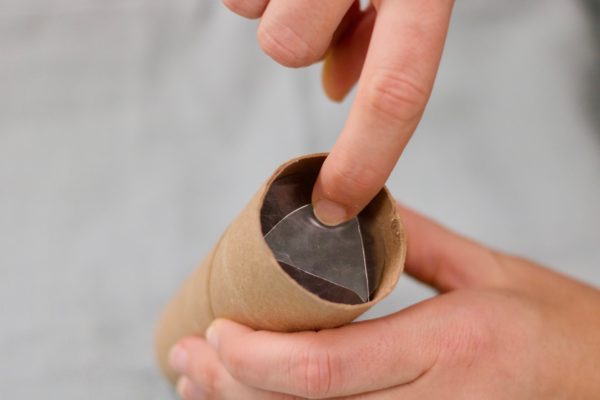
2. Cut a large square out of the tin sheet. The sheet needs to be able to fit snug inside the paper roll. You’ll fold this sheet into three equal sections so that it makes a triangle when you fold up two sides.
3. Put the folded tin foil sheet into the paper roll. There should be a little room at the top so you can add a plastic piece over it.
4. Trace two circles onto the plastic sheet. One circle should be a bit smaller so it can fit snug inside of the paper roll. Cut these two circles out.
5. Put the smaller plastic circle into the paper roll. There should still be some space to add the reflective items. See left photo for reference.
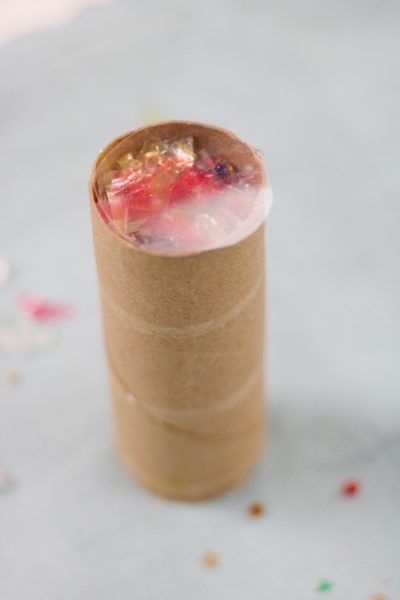
6. Add the reflective items on top of the smaller plastic circle. Then cover this by adding the bigger plastic circle on top. You’ll glue this top piece in place so the reflective items don’t fall out.
7. Add the paper viewfinder to the other end of the paper roll. You’ll super glue this in place as well. Your reflective pieces and viewfinder should be located at opposite ends of the paper roll.
8. The final step is adding a piece of colored paper around the paper roll. Cut a rectangle out of the colored paper. Then wrap it around the roll and tape the overlapping ends together. Make sure you tape the colored paper to itself and not to the paper roll. The roll should be able to spin within the colored paper. By spinning the paper roll while looking through the viewfinder, you can change what reflective pieces you see!


